
Light painting is a lot of fun and I have always enjoyed capturing movement/motion in my photography.
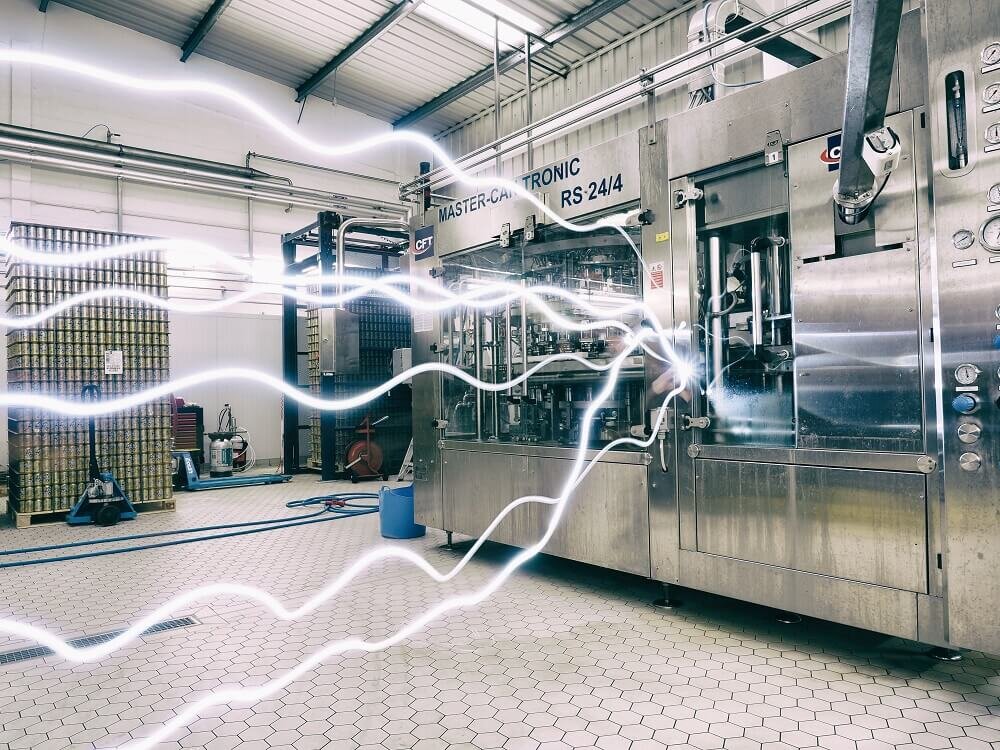
For a few years I’ve practiced it on the side of my urban / street photography and I was hired by Citroen and The Beavertown Brewery to produce a few photos for them.
I’ve had enough practice over the years to share a few light painting photography ideas and tips which I hope will inspire you to give it a go, unless you are already fully familiar with it.
Still, we never stop learning so there may be something good in here for you!
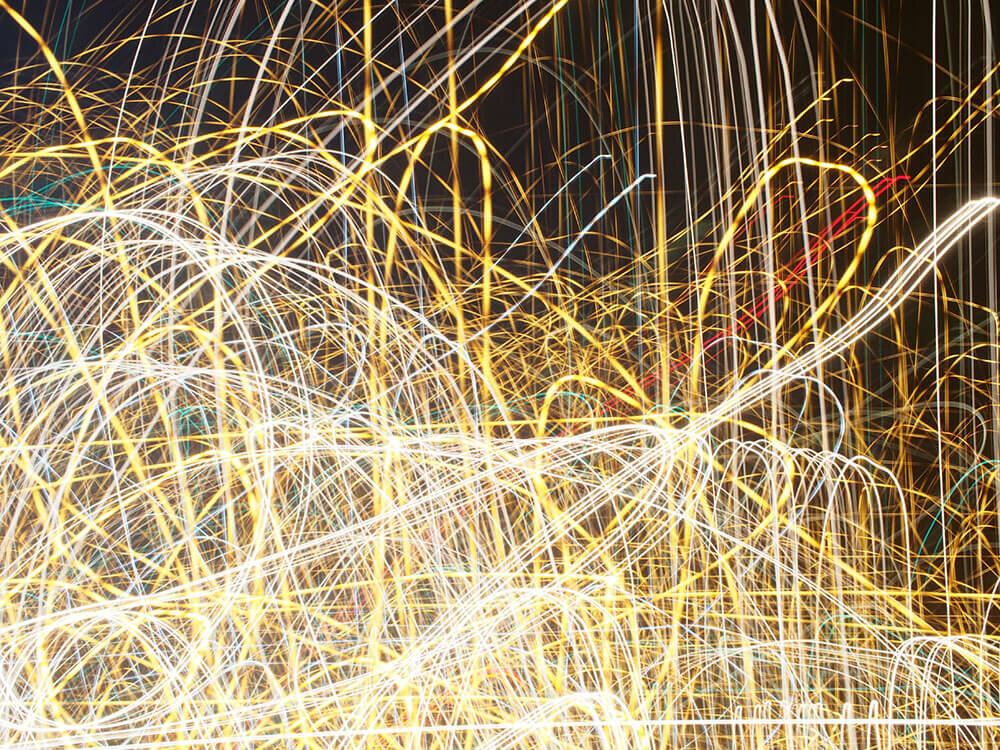
When we talk about light painting we first need to understand that all photography is light painting. Photography coming from the Greek “to draw with light”.
Light hits the sensor or film in the camera and records where the light hit it.
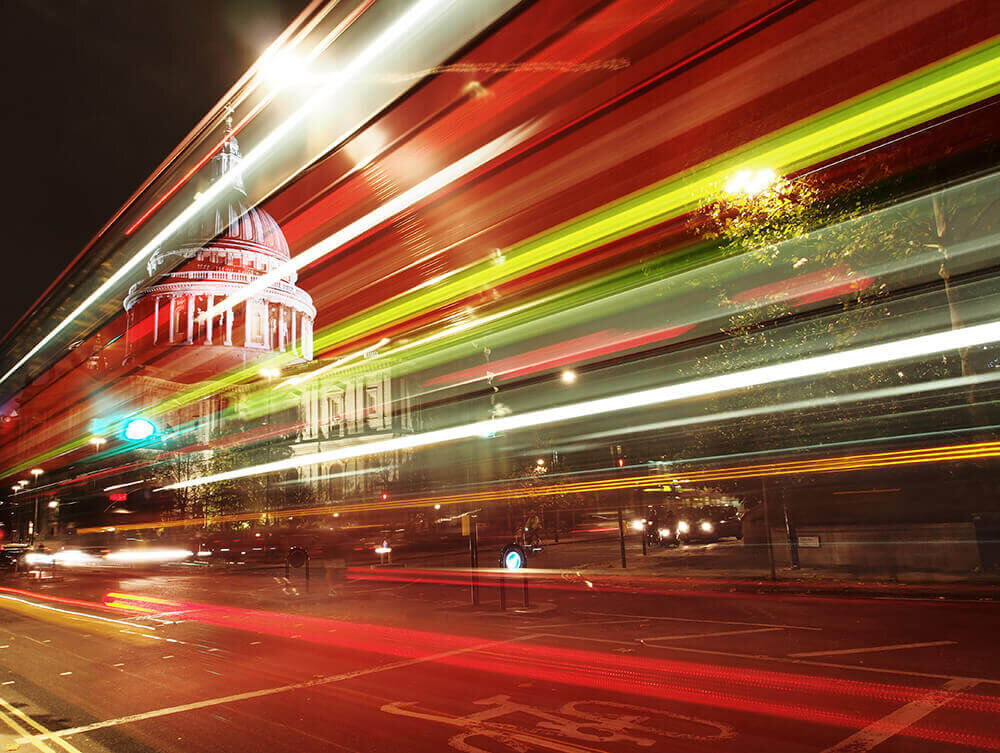
So if the source of light moves, while the camera remains static on a tripod, such as for example a bus by night, with a slow shutter speed (of a second or so) the shutter remains open long enough for the camera to capture the “passing” of light across its sensor.
You get something like this which IS light painting as well:
I remember when I first tried light painting around 2008. It was early in my photography days, before I had a website and I used to post on Flickr. Even if I’m mostly known for my urban photography, I’ve always loved exploring other kinds of photography.
I was in my flat in London, I grabbed an illuminated gadget pen, set a 10 second exposure and a 10 second timer to get into position and after writing every letter in the air in REVERSE while facing the camera (important)… this came out after only a couple of attempts:
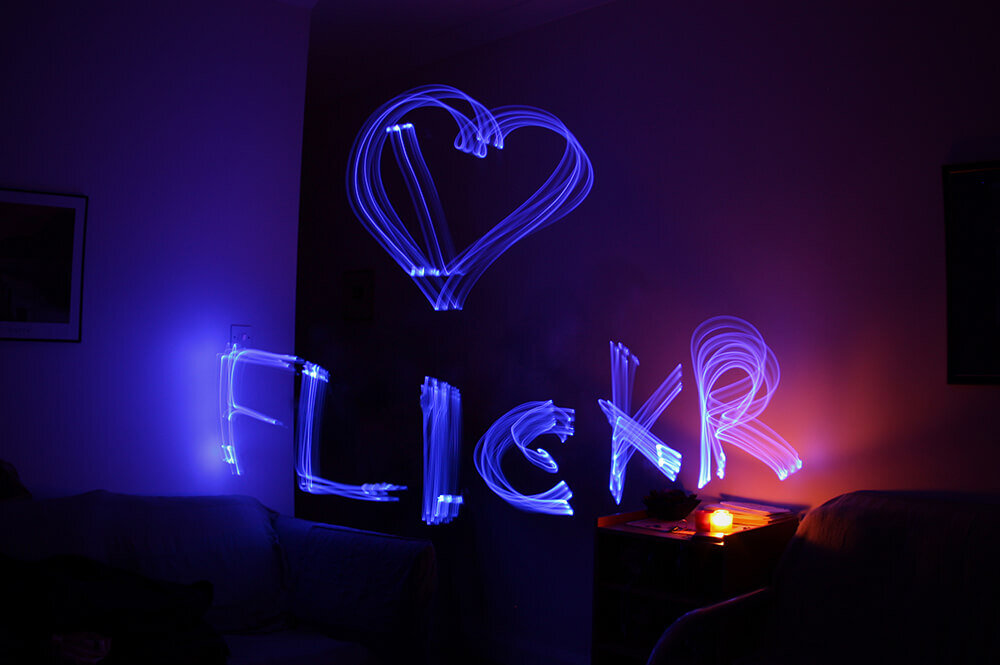
Now I realise that should I have given it a little more thought I could have written it the normal way and THEN invert the photo in Photoshop saving me the headache!
That’s what photography is: One long bit of learning.
I have also played with the idea of intentional camera movement which again is painting with light but this time you are not moving the light source whilst the camera is static, instead the light source is static and you move the camera. It can produce unexpected and interesting results.
This is a photo of cars at a traffic light, I set a two second exposure and shook the camera for that duration. It’s not a masterpiece but it can plant the seed of an idea, like any experimentation:
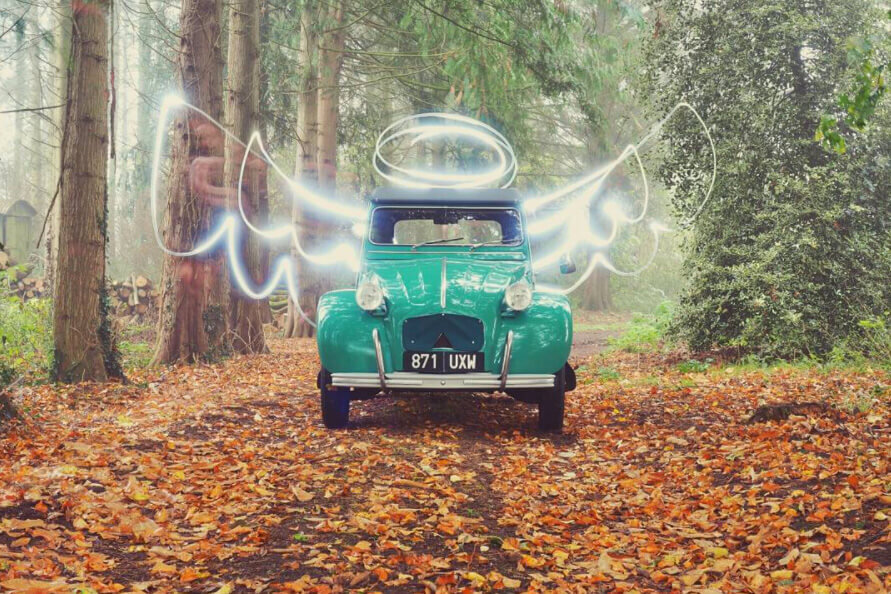
Some of you may be aware that I own an old French classic, a 1964 2CV.
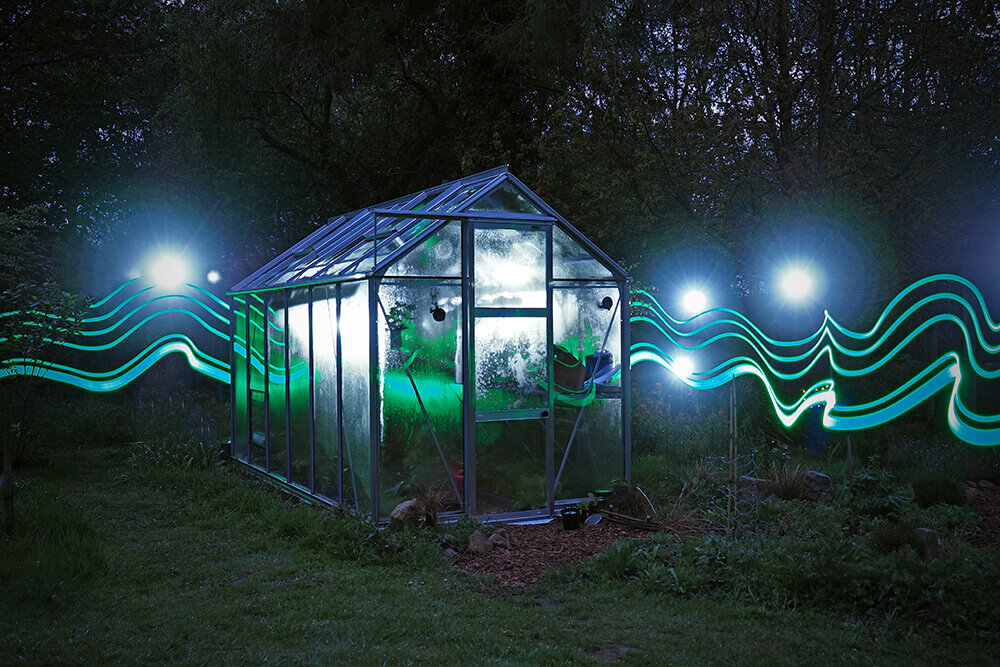
Here’s something fun I created but this time with a powerful LED torch light in broad daylight using a Neutral Density filter (ND Filter) which is a screw-on filter for the front of your lens.
A neutral density filter is kind of like sunglasses for your camera. On a bright day you will struggle to capture long exposures so an ND filter reduces the amount of light which enters the lens and hits the sensor therefore allowing for longer exposures in full daylight.
Landscape photographers use them to capture cloud movement or to capture rivers for example, because they can then capture longer exposures, the water looks incredibly flat as it eliminates ripples or rather blends them all into one flat surface.
In this case I used a powerful torchlight just like I would use a pen and drew the angel wings in the air while always pointing the flashlight towards the lens. The magic is that the camera doesn’t capture me much, only the light as it’s much brighter than I am (I’m not too smart you say?).
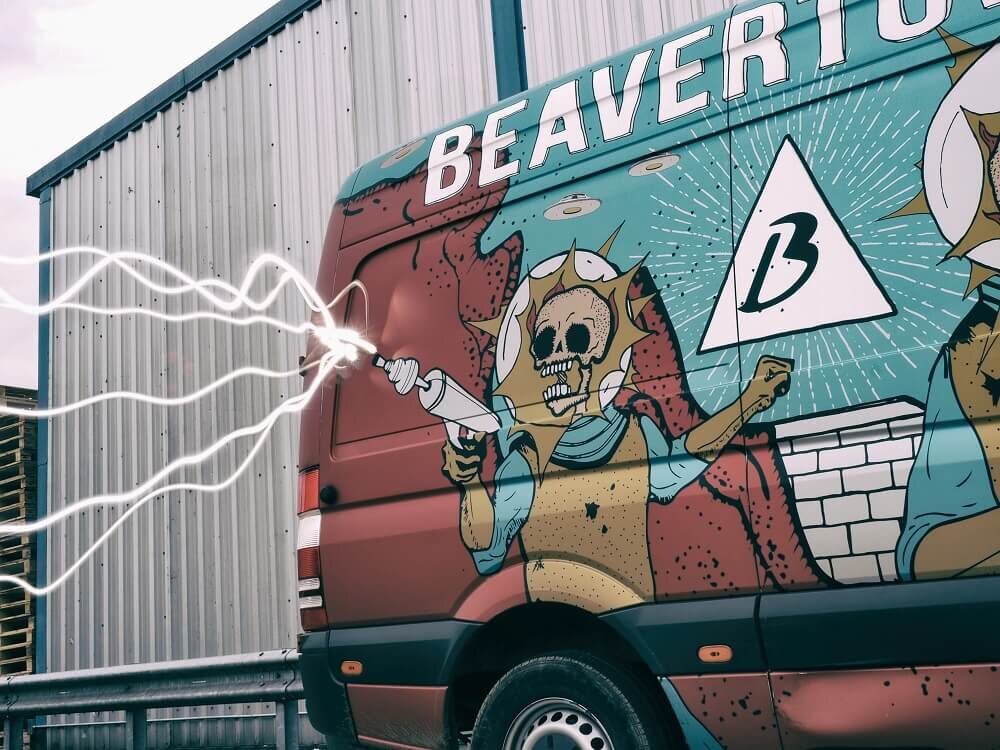
I applied the same principle when the Beavertown Brewery hired me, drawing with a torchlight essentially pointing towards the camera and moving fast so the camera didn’t capture me much.
Electric stuff right?
And finally, here’s a shot I created for the Citroen Picasso (appropriately named!).
No Photoshop, all in-camera, just three people frantically shaking lights, glowsticks and my secret weapon… the Pixelstick.
All this movement and activity in a single still shot.

So there you have it. An introduction to light painting photography with real examples shot by yours truly and I hope enough to motivate you to give it a go and take your photography to the next level!
It’s not difficult, just start… that’s the hardest part in anything. As you can see above, I progressed by keeping at it.
Choose a low light / dark location, camera on tripod, set a long shutter (+/- a few seconds) and agitate glow sticks, make shapes with your arms. See what comes out and try again gradually improving what you capture by changing parameters such as the location, the shutter speed +/-, different source of light (torch light, lightsaber, coloured fairy lights… ).
Trial, error, perseverance and ingenuity is how you can become good at ANYTHING.
Have fun.
Until next time,